Android-x86
Run Android on your PC
Installation
Introduction
We have implemented a text-based easy installer to help install Android-x86 to a hard drive. These filesystems are supported:- ext4
- ntfs
- fat32
In particular, you can install Android-x86 to an NTFS filesystem to co-exist with Windows. See the Advanced Section for more details.
Step by Step
- Download an iso image from a mirror site. Usually you should just use the latest image.
- Burn the iso image to cdrom, or create a bootable USB disk (recommended). See the Advanced Section for details.
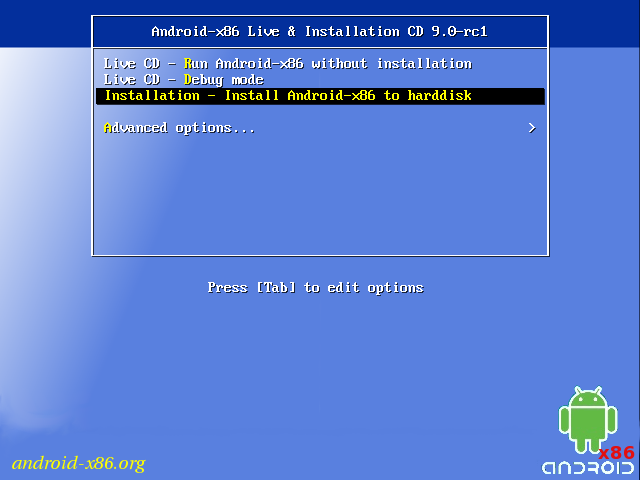
- Boot from the Android-x86 installation CD/USB, choose the 'Install Android-x86 to harddisk' item, as shown below:
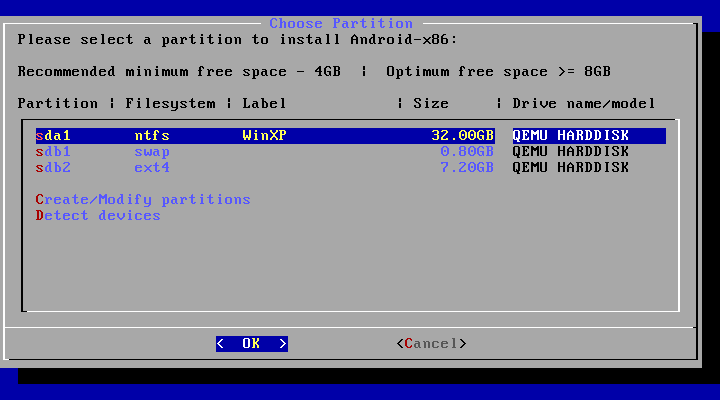
- After seconds of booting, you will see a partition selection dialog. You can choose an existing partition to install Android-x86, or you can create or modify partitions by choosing 'Create/Modify partitions'. Note you can install Android-x86 to an external disk like USB drive. If the target drive is not shown, try 'Detect devices'.
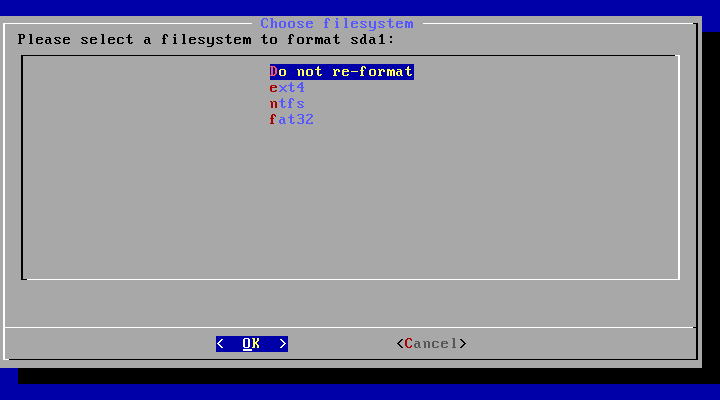
- Android-x86 can co-exist with other operating system or data in the chosen partition. If the partition is formatted, you may choose 'Do not re-format' to keep existing data. Otherwise, choose a filesystem type to format. Note the type you chose must match the partition id, or the boot loader will fail to boot.
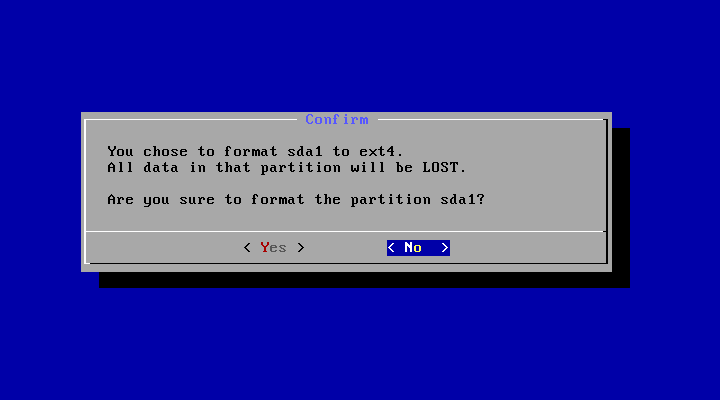
- If you choose to format the partition, you will see a warning like below. Select 'Yes' to confirm, or select 'No' to keep the original filesystem.
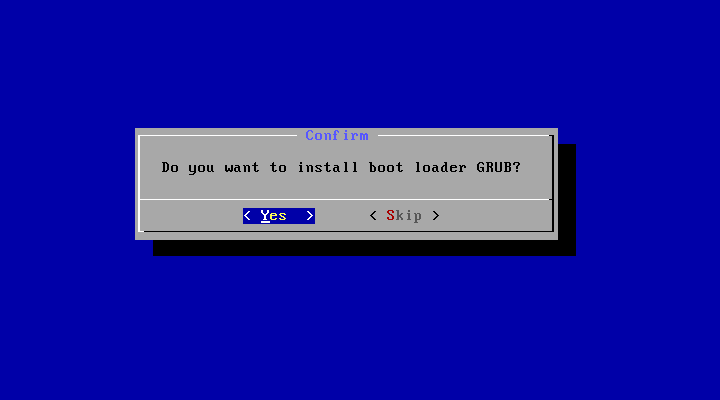
- Next question is whether to install boot loader Grub. Usually you should answer 'Yes', unless you want to install boot loader by hand yourself.
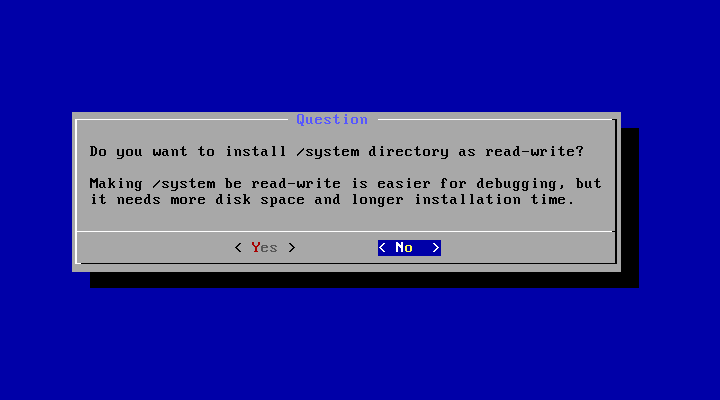
- Then the installer will ask if you want to install /system directory as read-write. If you want to modify the system for some purposes (e.g., debugging), select 'Yes'.
- If you are lucky, the installation will begin, and you will see the progress bar.

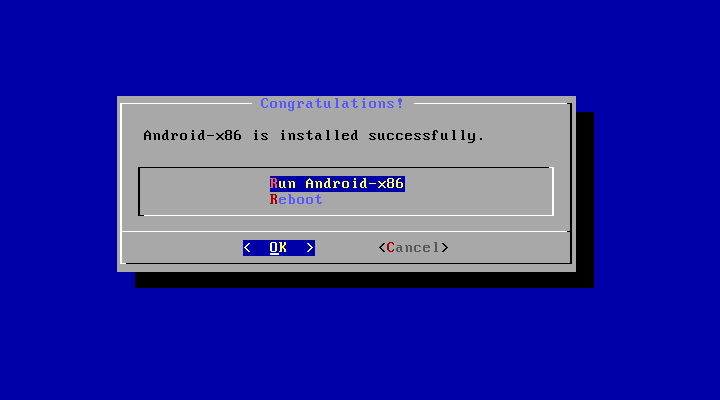
- If you see the following screen, the installation is complete. Congratulations! Now you can run Andrond-x86 directly, or you can reboot and run it:
Upgrade
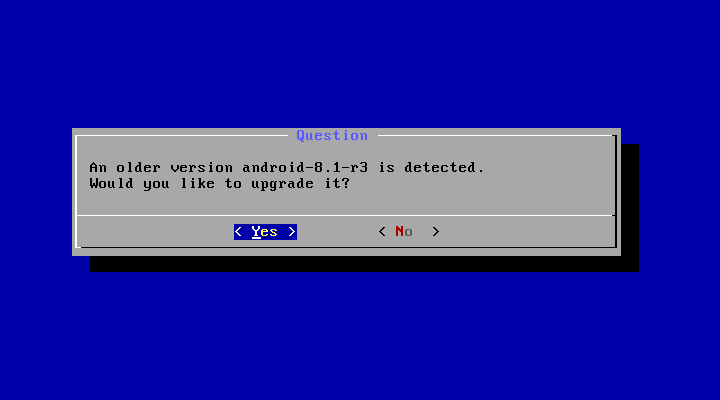
You may upgrade an older Android-x86 installation by the installer. Just select the partition containing the older installation. The installer will prompt if you'd like to upgrade it:
Select 'Yes' to upgrade it. Select 'No' to install the new version to a new directory and keep the older installation untouched.
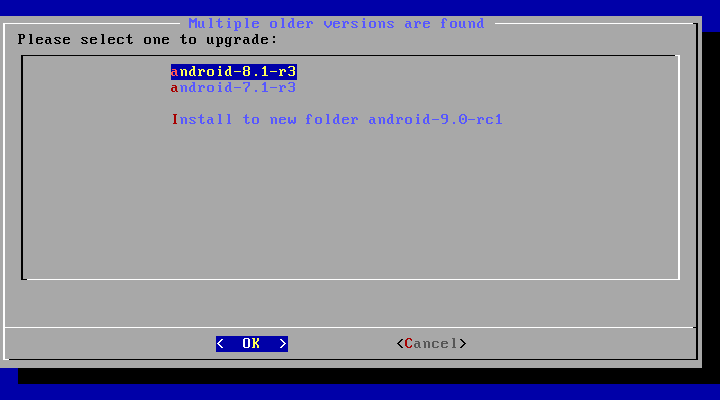
If there are multiple older versions in the same partition, the installer will ask which version to upgrade:
Select the one you want to upgrade, or choose to install to a new folder.
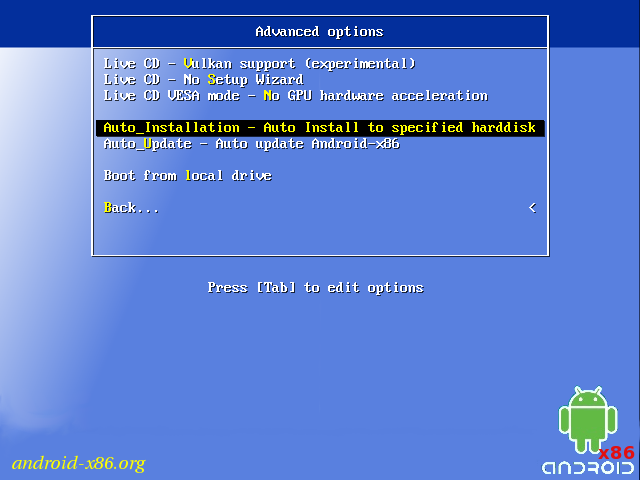
Auto Installation
If you want to use Android-x86 as the only OS in your device, you may choose "Auto Installation" under the "Advanced options".
The installer will prompt you to confirm:
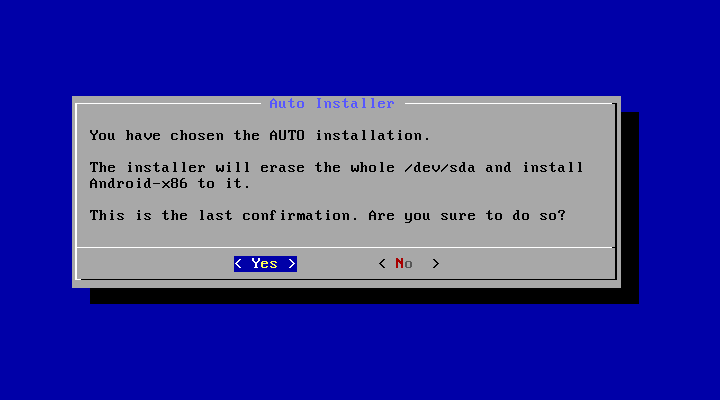
After you select 'Yes', the installer will erase the whole content of the hard disk, partition and install Android-x86 to it.
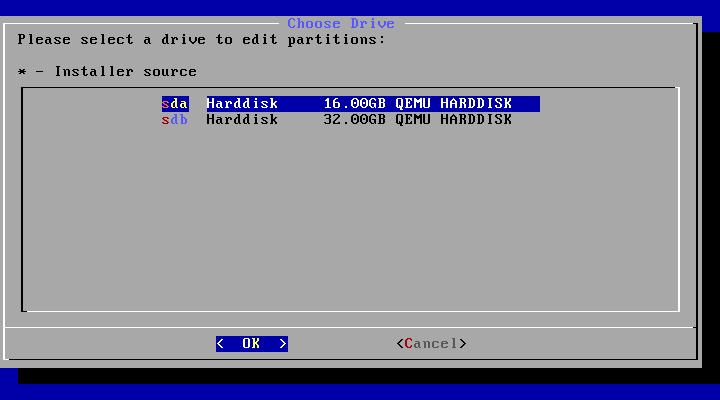
If you have multiple hard drives, the installer will let you choose which one to use. Be careful to choose the correct one.
Auto Update
By choosing "Auto Update" under the "Advanced options", the installer could update an older installation automatically.
In this mode, the installer searches a partition named "Android-x86" or the first ext4 partition, and update the older installation in it automatically. If no such a partition is found, the auto update mode will be cancelled.
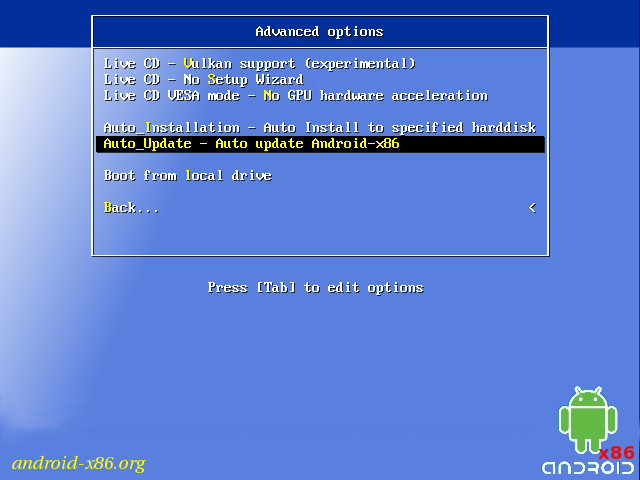
Other boot options
- Live CD - Run Android-x86 without installation
- Live CD - Debug mode
- Live CD - Vulkan support (experimental)
- Live CD - No Setup Wizard
- Live CD VESA mode - No GPU hardware acceleration
The item means to boot Android-x86 directly. This is useful to check if your hardware is compatible with Android-x86 quickly. All data is stored in RAM (tmpfs) and will lose after poweroff.
See the debug howto for more details.
Enable the experimental Vulkan support. Not all GPUs support it.
Skip the Setup Wizard. It's useful if you want to test some apps quickly in live mode.
Disable GPU hardware acceleration. If you encounter black screen after booting, you may try this mode to see if it's bootable.
Advanced
Create a bootable USB stick for Android-x86
There are several tools which could be used to create a bootable USB stick for Android-x86. The following tools are available for Windows users:
- Win32 Disk Imager - see demo video.
- UNetbootin - see demo video.
- Rufus - see demo video.
- Linux Live USB Creator (LiLi) - Obsolete software, but used to officially support Android-x86 until v4.4.
For Linux users, just use the standard dd command like:
dd if=android-x86_64-9.0-rc1.iso of=/dev/sdX
Multi-Boot
To boot other operating systems, you have to add items for them to /grub/menu.lst. For example, to boot Windows, add the following:
rootnoverify (hd0,0)
chainloader +1
This assumes Windows is installed to the first partition of the first hard disk. Alternatively, you need to change rootnoverify to the appropriate value. See Grub Manual for details.
Updated (2010)
Since froyo-x86, if there is an NTFS partition in the installed disk, the installer will ask if you want to create a boot item for Windows, as shown below.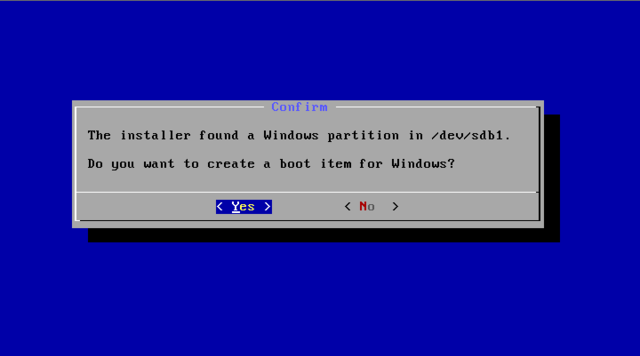
Issues
VMware
You have to change your virtual disk type to be IDE because the default type in VMware is SCSI, and Android-x86 kernel is not configured to support SCSI. You can follow these steps:
- Create a virtual machine.
- Edit virtual machine settings after the virtual machine created.
- Choose the hard disk and remove it.
- Add a hard disk to create a new virtual disk, then you can choose IDE as your virtual disk type.
- When finished, you can install android-x86 normally.